7. Configuring NOAA Cloud Service Providers
The NOAA Cloud Service Providers (CSP) support the forecast-only configurations for the global workflow. Once a suitable CSP instance and cluster is defined/created, the global workflow may be executed as on the other platforms discussed in the previous sections. In order successfully execute the global-workflow, a suitable CSP cluster must be created. Currently the global-workflow supports the following instance and storage types as a function of CSP and forecast resolution.
Cloud Service Provider |
Global Workflow Resolution |
Global Workflow Application |
Instance Type |
Partition |
File System |
|---|---|---|---|---|---|
Amazon Web Services Parallel Works |
C48 |
|
|
|
|
Instructions regarding configuring the respective CSP instance and cluster follows.
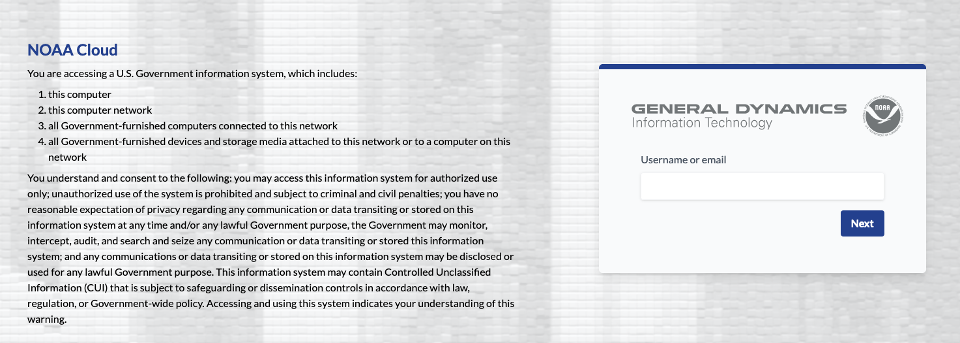
7.1. Login to the NOAA CSP
Log in to the NOAA CSP and into the resources configuration. The user should arrive at the following screen.
Note that the Username or email query is case-sensitive. The user
will then be prompted for their respective RSA token key using the
same application use for the other RDHPCS machines (i.e., Hera, Jet,
etc.,).
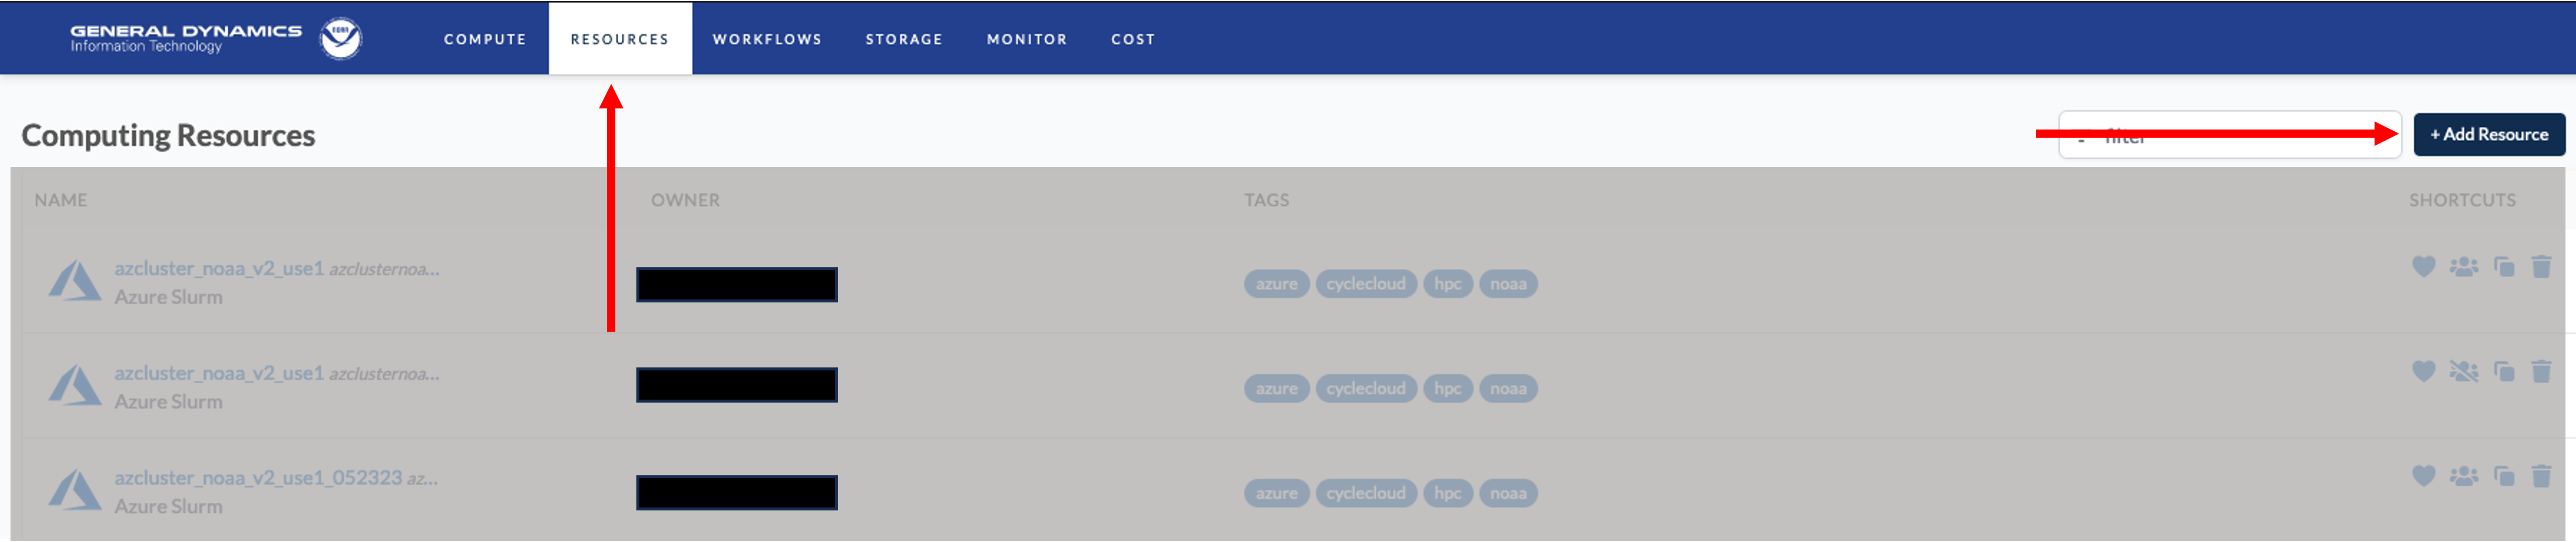
7.2. Configure the NOAA CSP Instance
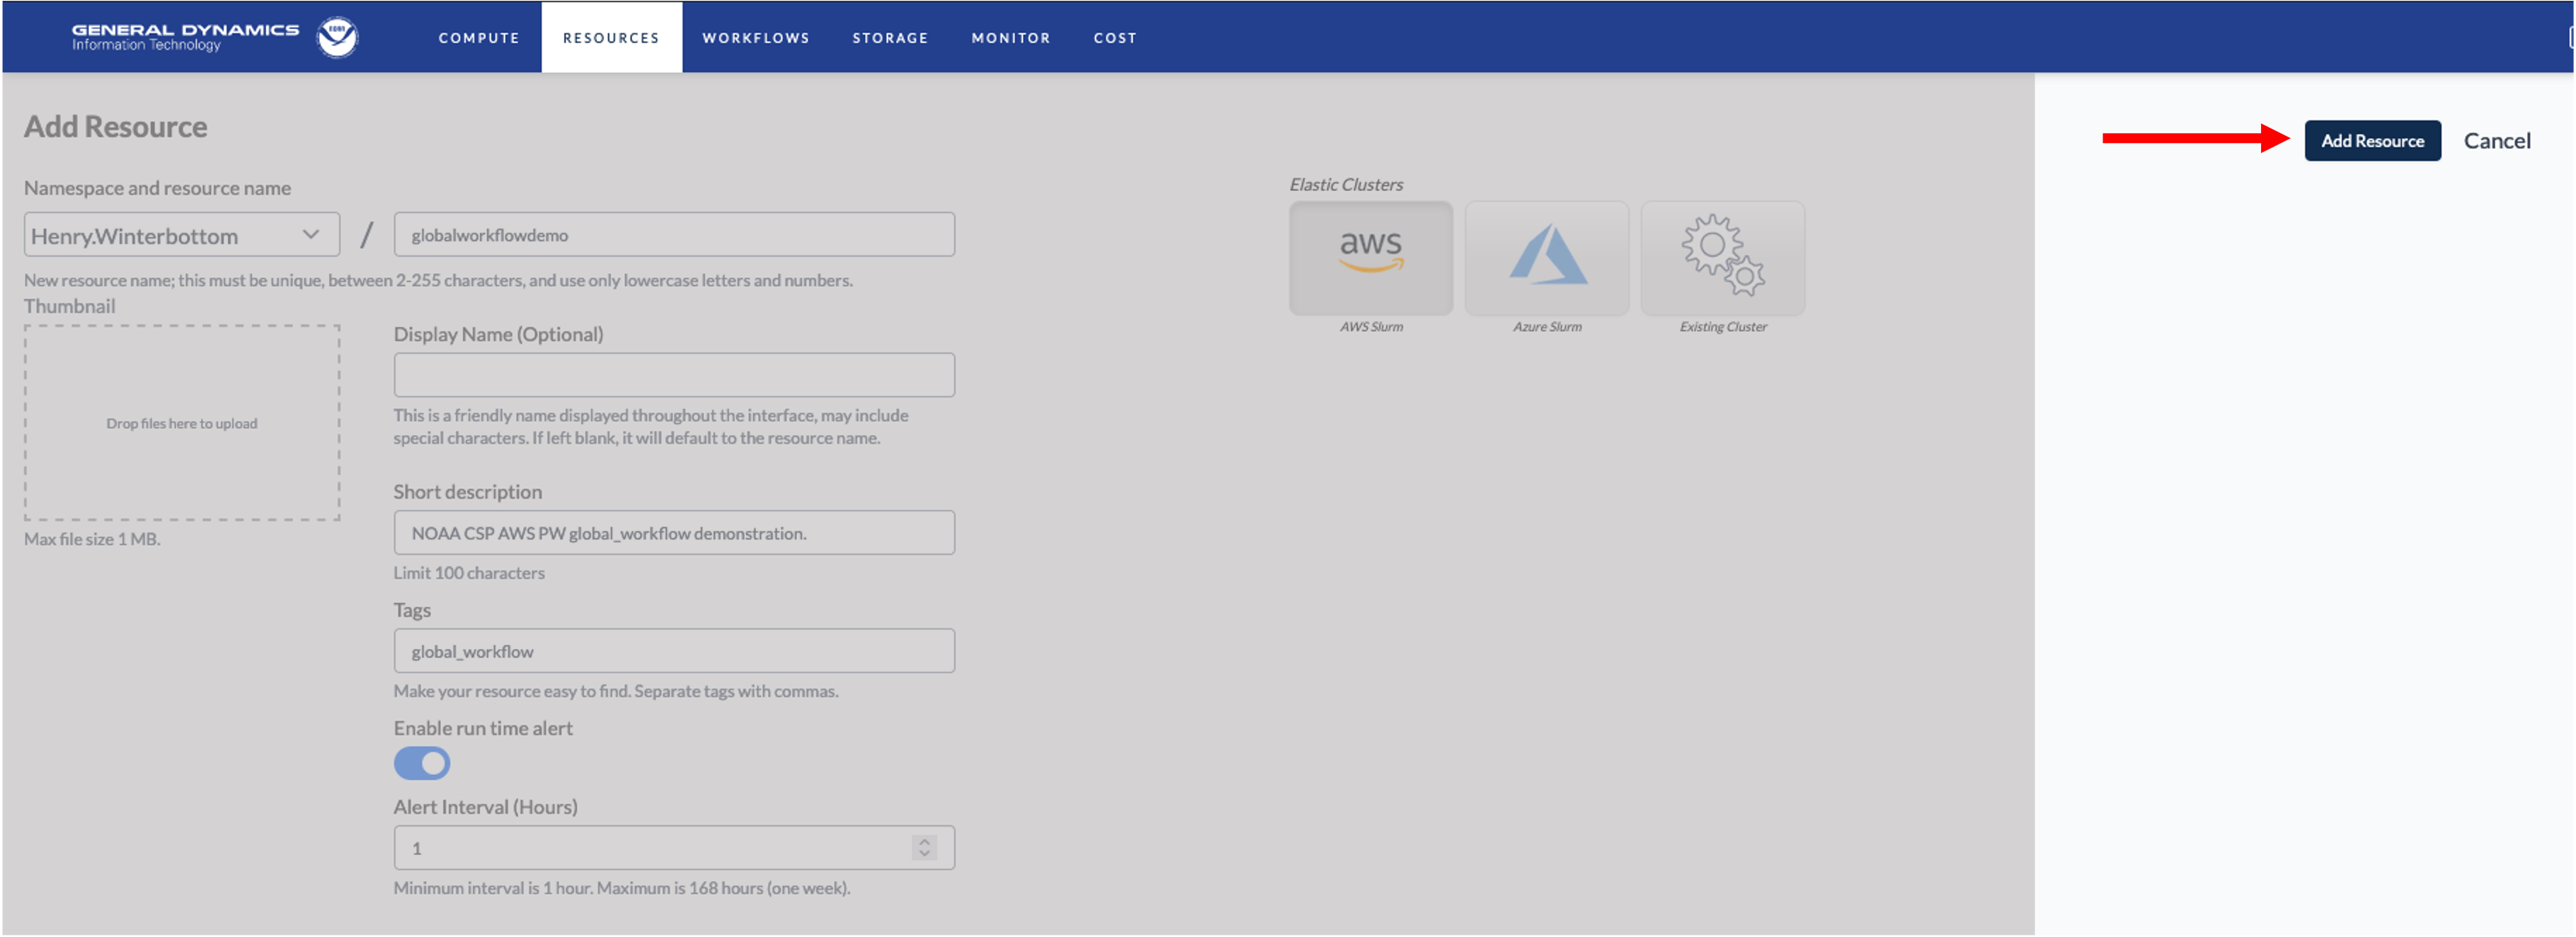
Once logged into the NOAA CSP, navigate to the RESOURCES section
and click the + Add Resource button in the upper-right corner as
illustrated below.
Next, the mandatory attributes for the respective instance must be defined as shown in the illustration below.
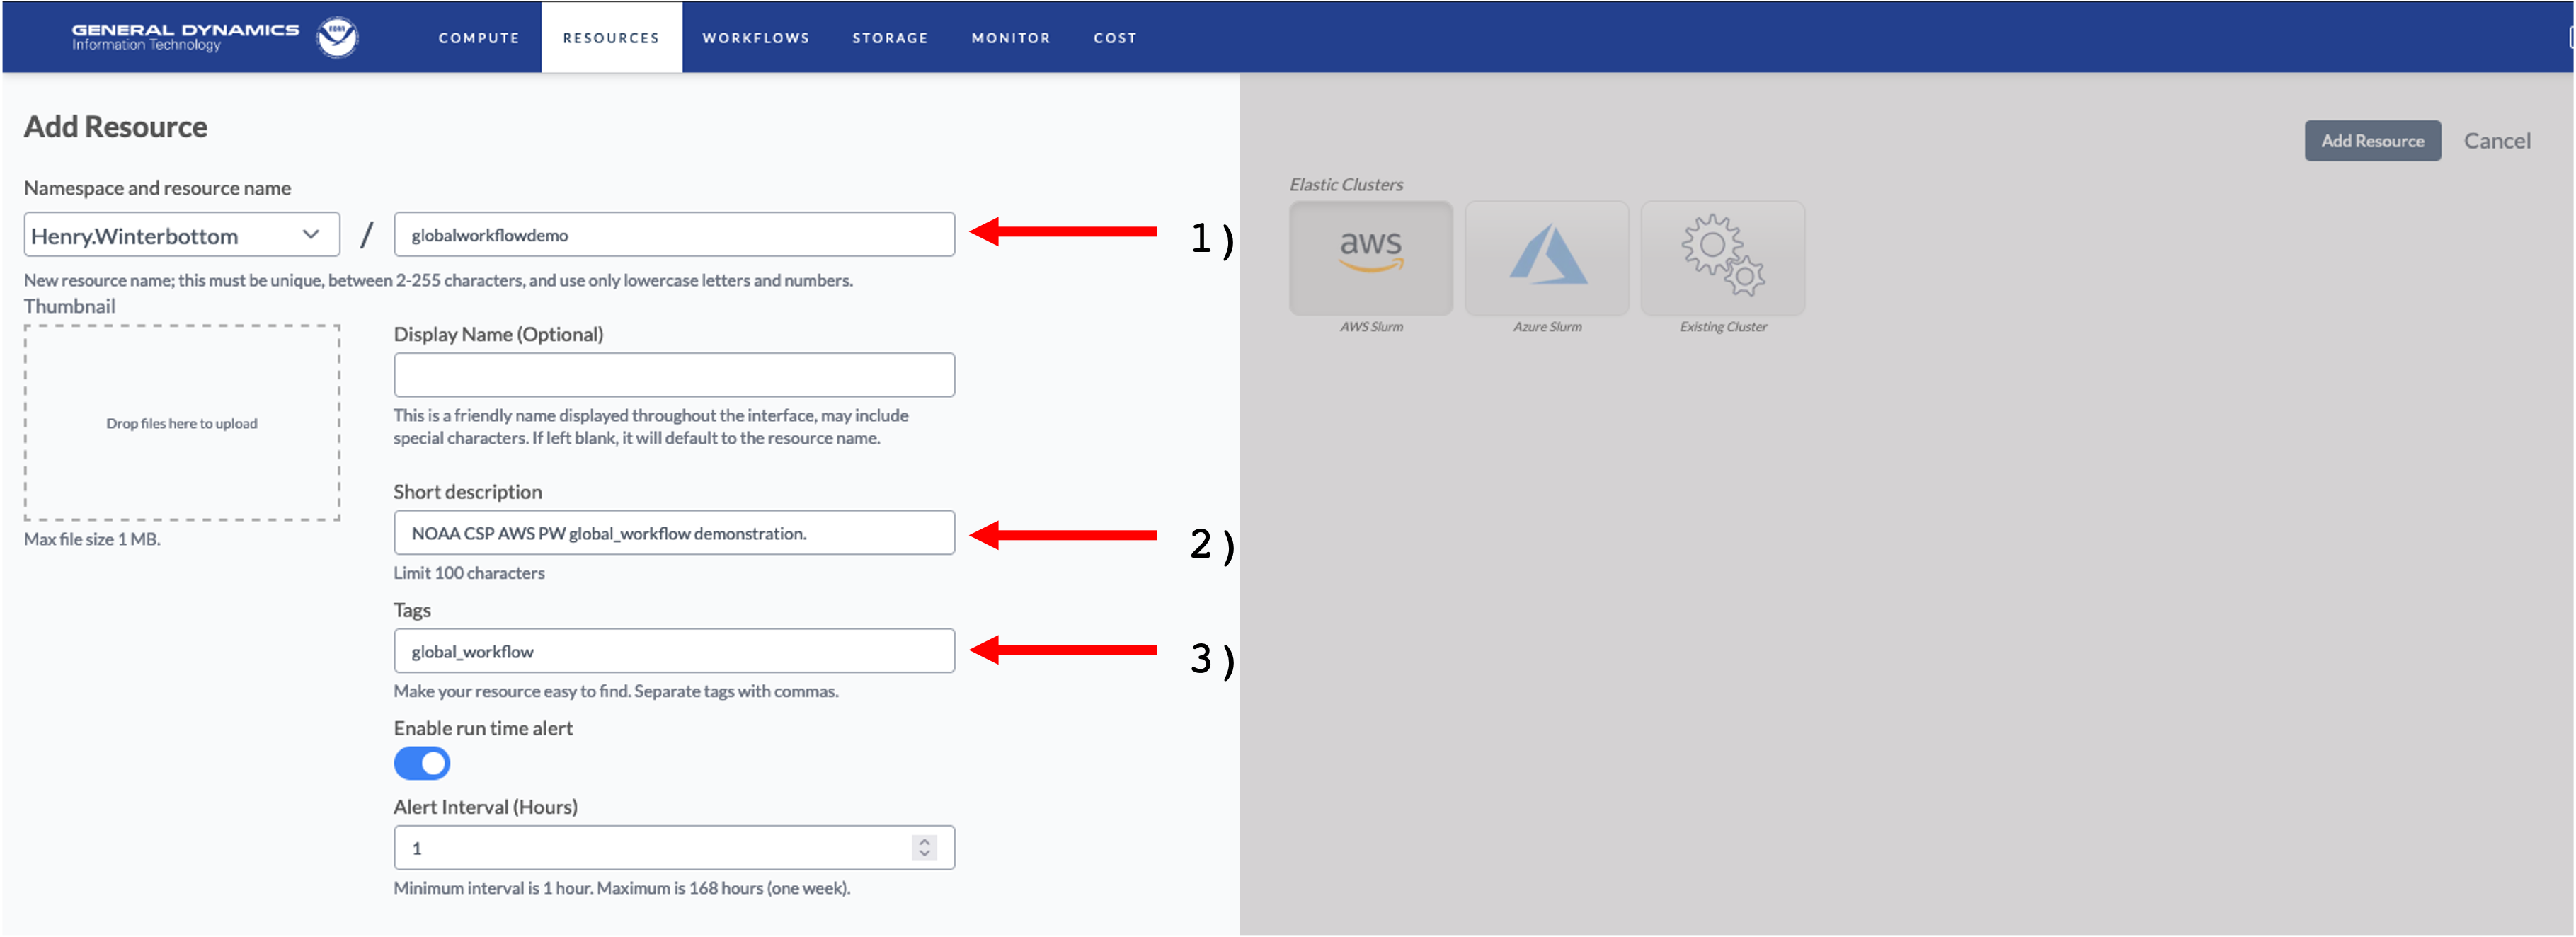
The annotated attributes and their respective descriptions are as follows.
A unique name for the instance. Best practices suggest one that is clear, concise, and relevant to the application.
A short description of the instance, i.e.,
This instance supports
this <task name> task.
Tag(s) describing and identifying the respective instance. These allow for improved bookkeeping, especially when a user has multiple or concurrent instance types.
Next, the cluster is defined as shown in the following illustration.
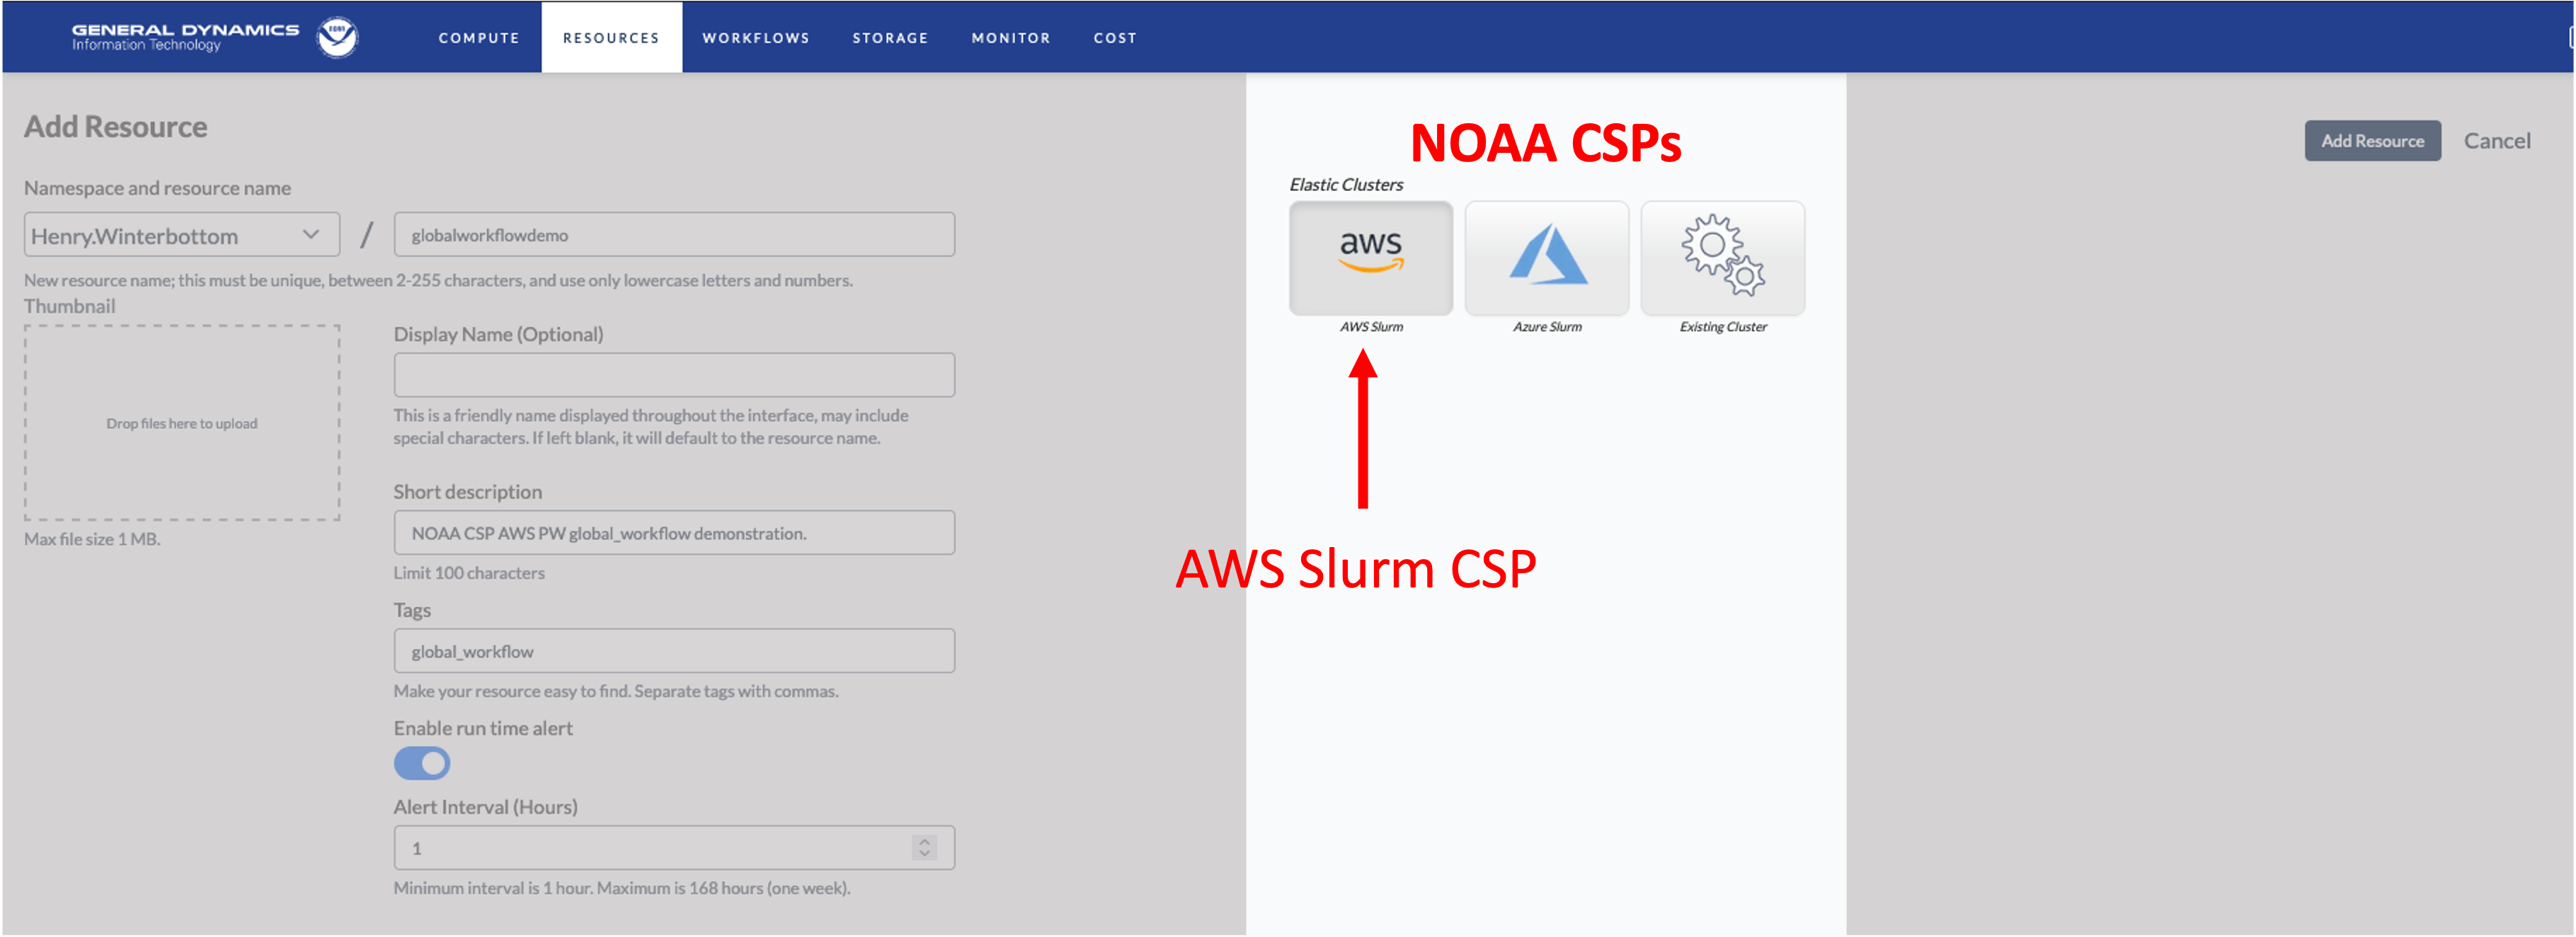
The NOAA Parallel Works initiative currently provides 2 CSPs for the global-workflow; AWS (Amazon Web Services) and Azure (Microsoft Azure). Existing clusters may also be modified. However this is neither recommended or supported.
Finally, when satisfied with the CSP instance configure, click Add
Resource as illustrated below.
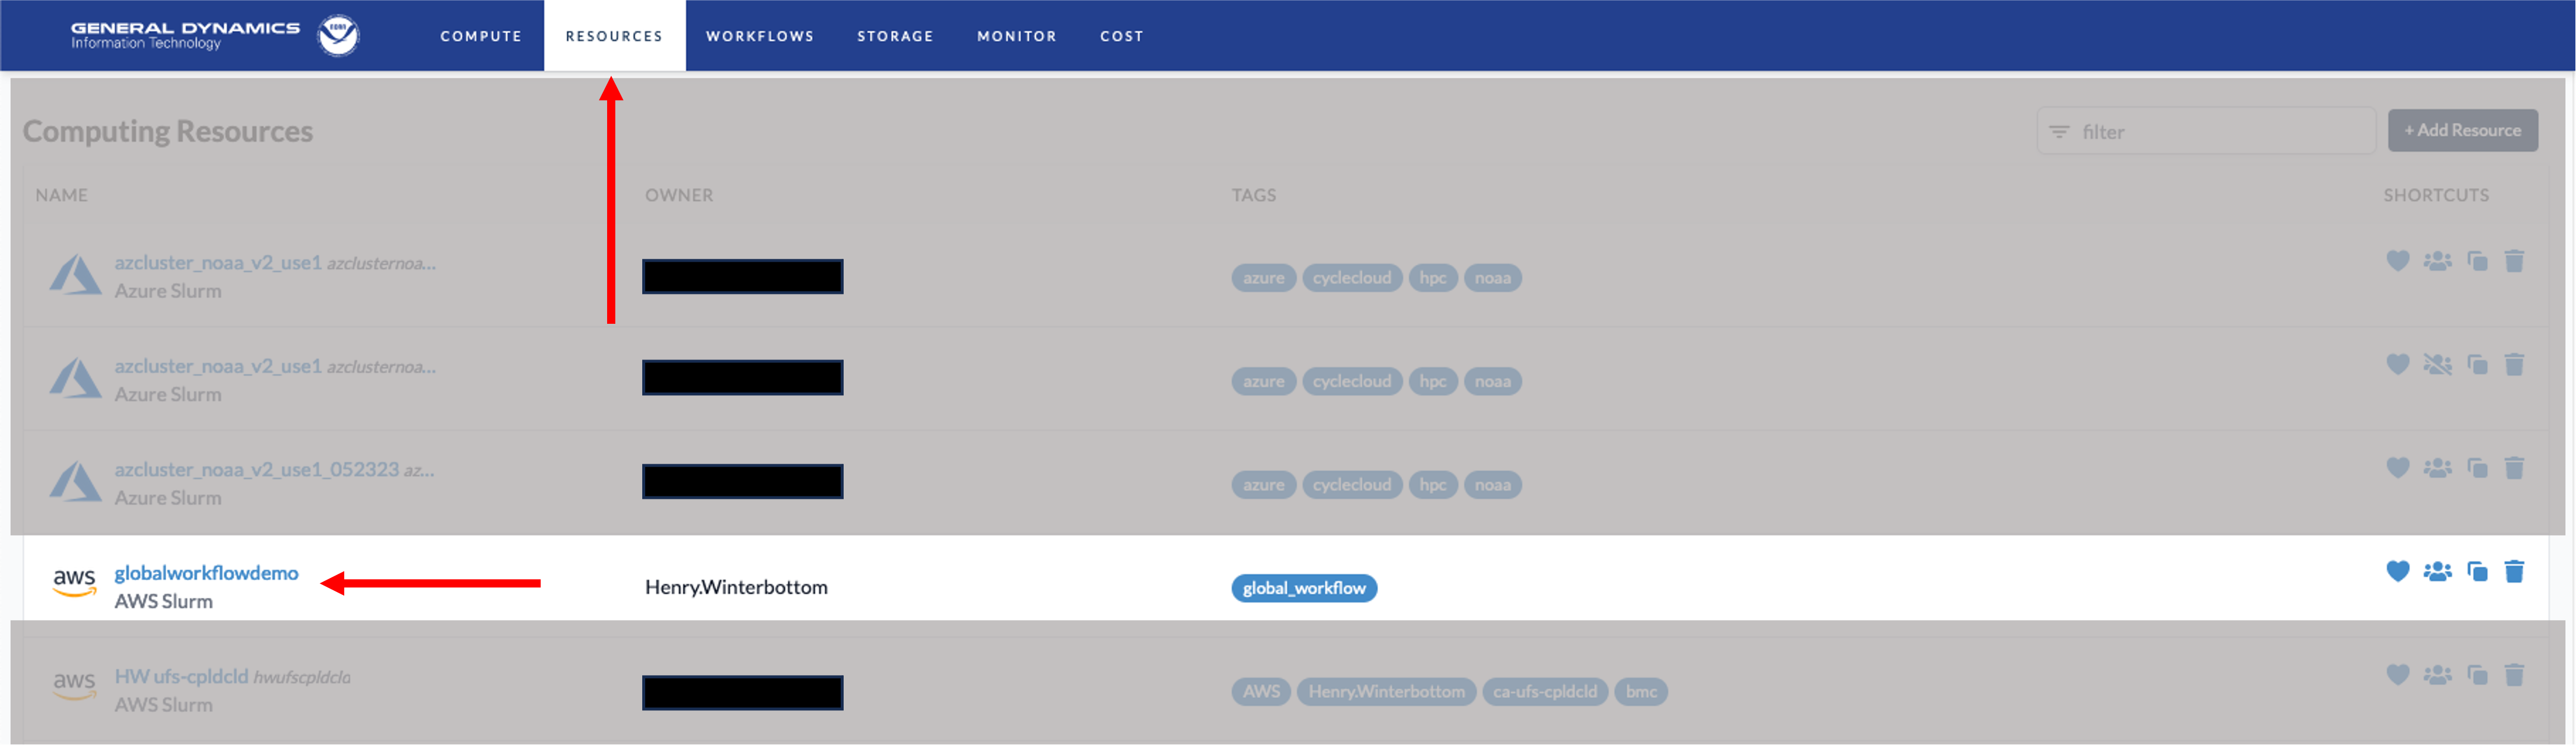
7.3. Configure the NOAA CSP Cluster
Navigate to the tab and locate the CSP instance configured in the previous section and click on the link, globalworkflowdemo for this example.
The respective CSP cluster maybe then be configured. The mandatory configuration attributes are as follows.
Availability zone;
Disk size and storage type(s);
Available compute and resource partitions.
The following image describes the general settings for the respective
cluster. These attributes are specific to the user and the respective
user’s group allocation. The right-most panel provides a breakdown of
the costs related to the requested compute and storage
resources. While there is a space to place an SSH key here, RDHPCS
recommends adding any SSH keys under the respective user’s
Account➡Authentication instead. This will allow you to connect
from another machine instead of using the Parallel Works web terminal.

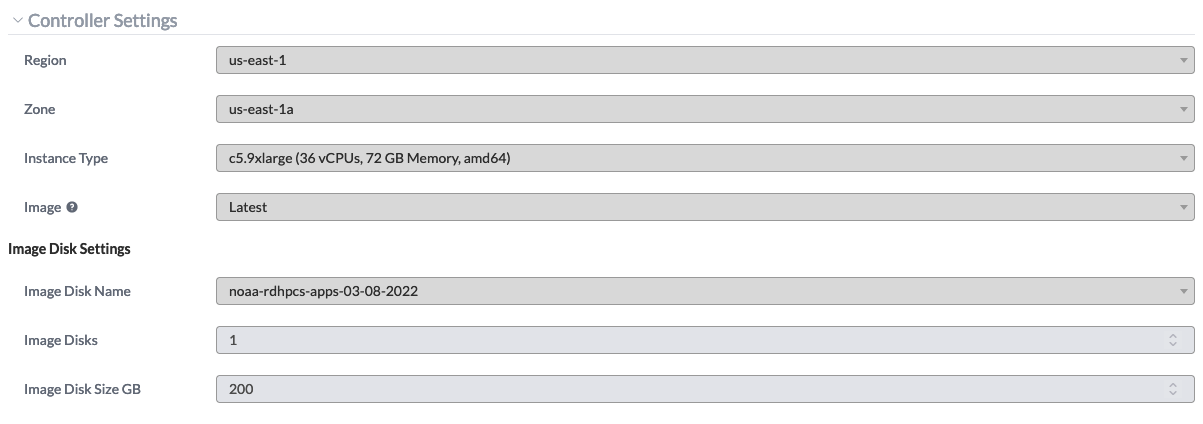
The following image describes the controller settings for a cluster created for a C48 atmosphere forecast-only configuration. Here the user must define the instance type (see the table above), the number of image disks and the image disk sizes.
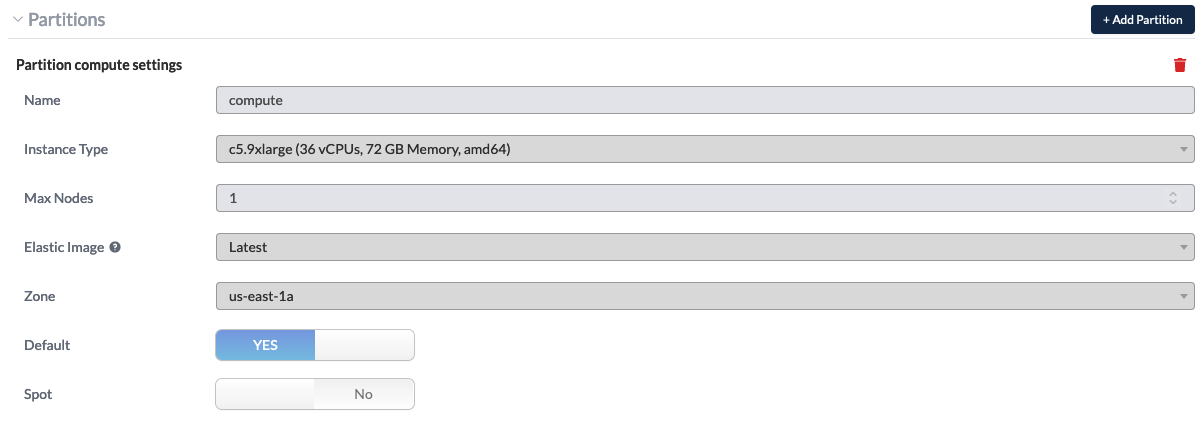
Next the partitions for the cluster may be defined. A partition
configuration for the aforementioned C48 atmosphere forecast-only
application is illustrated in the figure below. Note that the instance
type beneath Controller Settings and Partitions must be
identical. Other configurations are not supported by the
global-workflow team. Once the partitions are configured, click the
+ Add Partition button in the upper-right corner.
For the storage do be allocated for the global-workflow application it
is suggested that the Mount Point be /lustre. Once the storage
has been configured, click the + Add Attached Storage button in
the upper-right corner. This is illustrated in the following image.

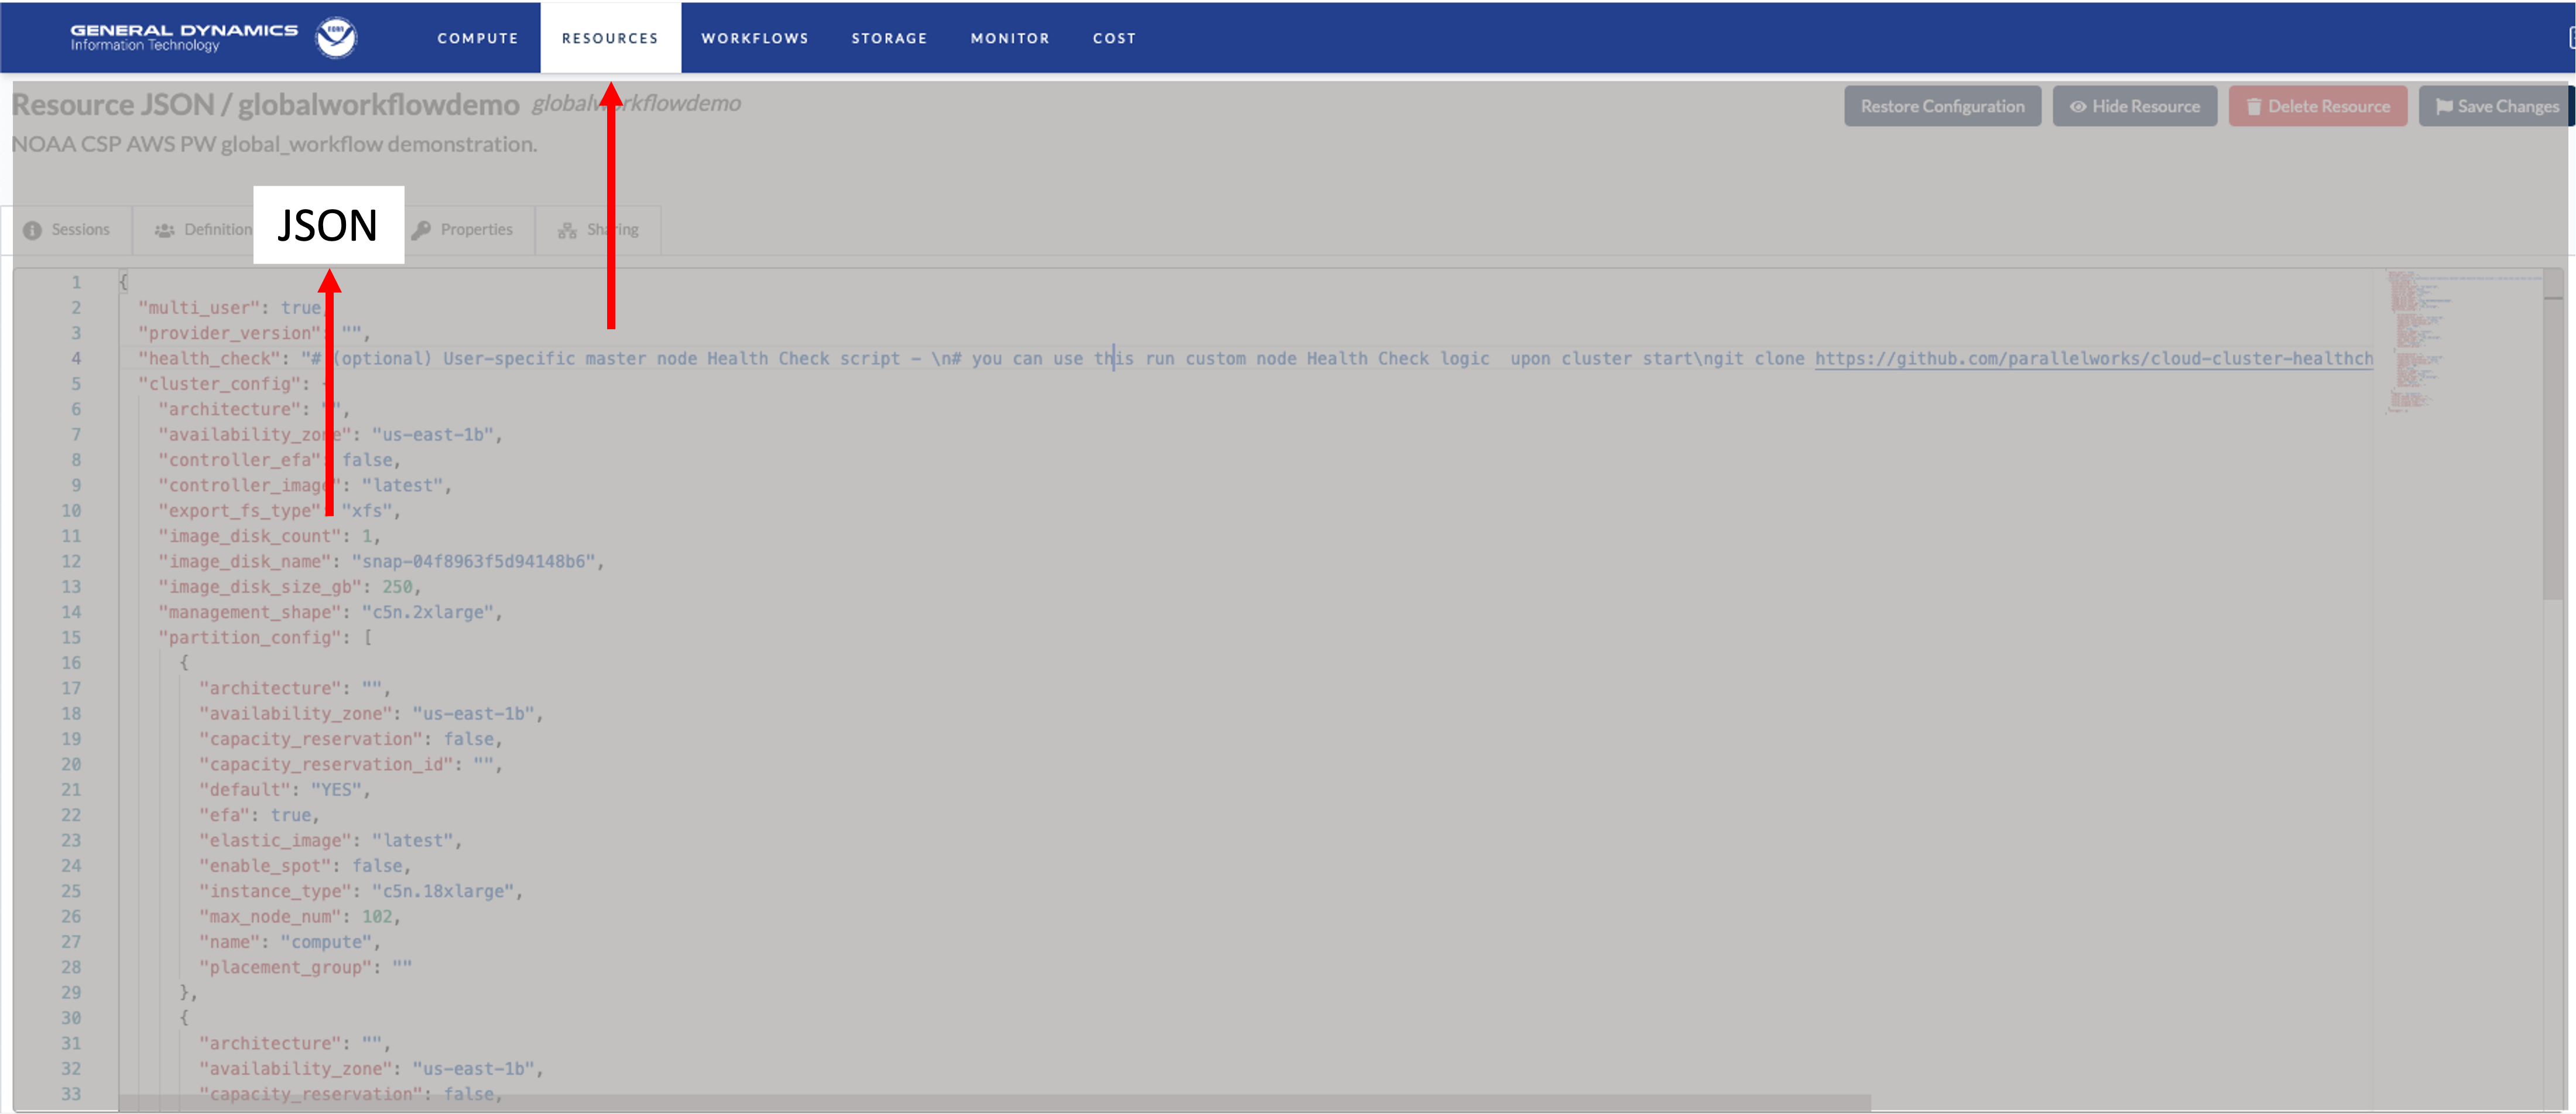
Finally, the following illustrates a JSON version of the cluster configuration created from the steps above. When opening issues related to the NOAA CSP global-workflow applications please include the JSON content.
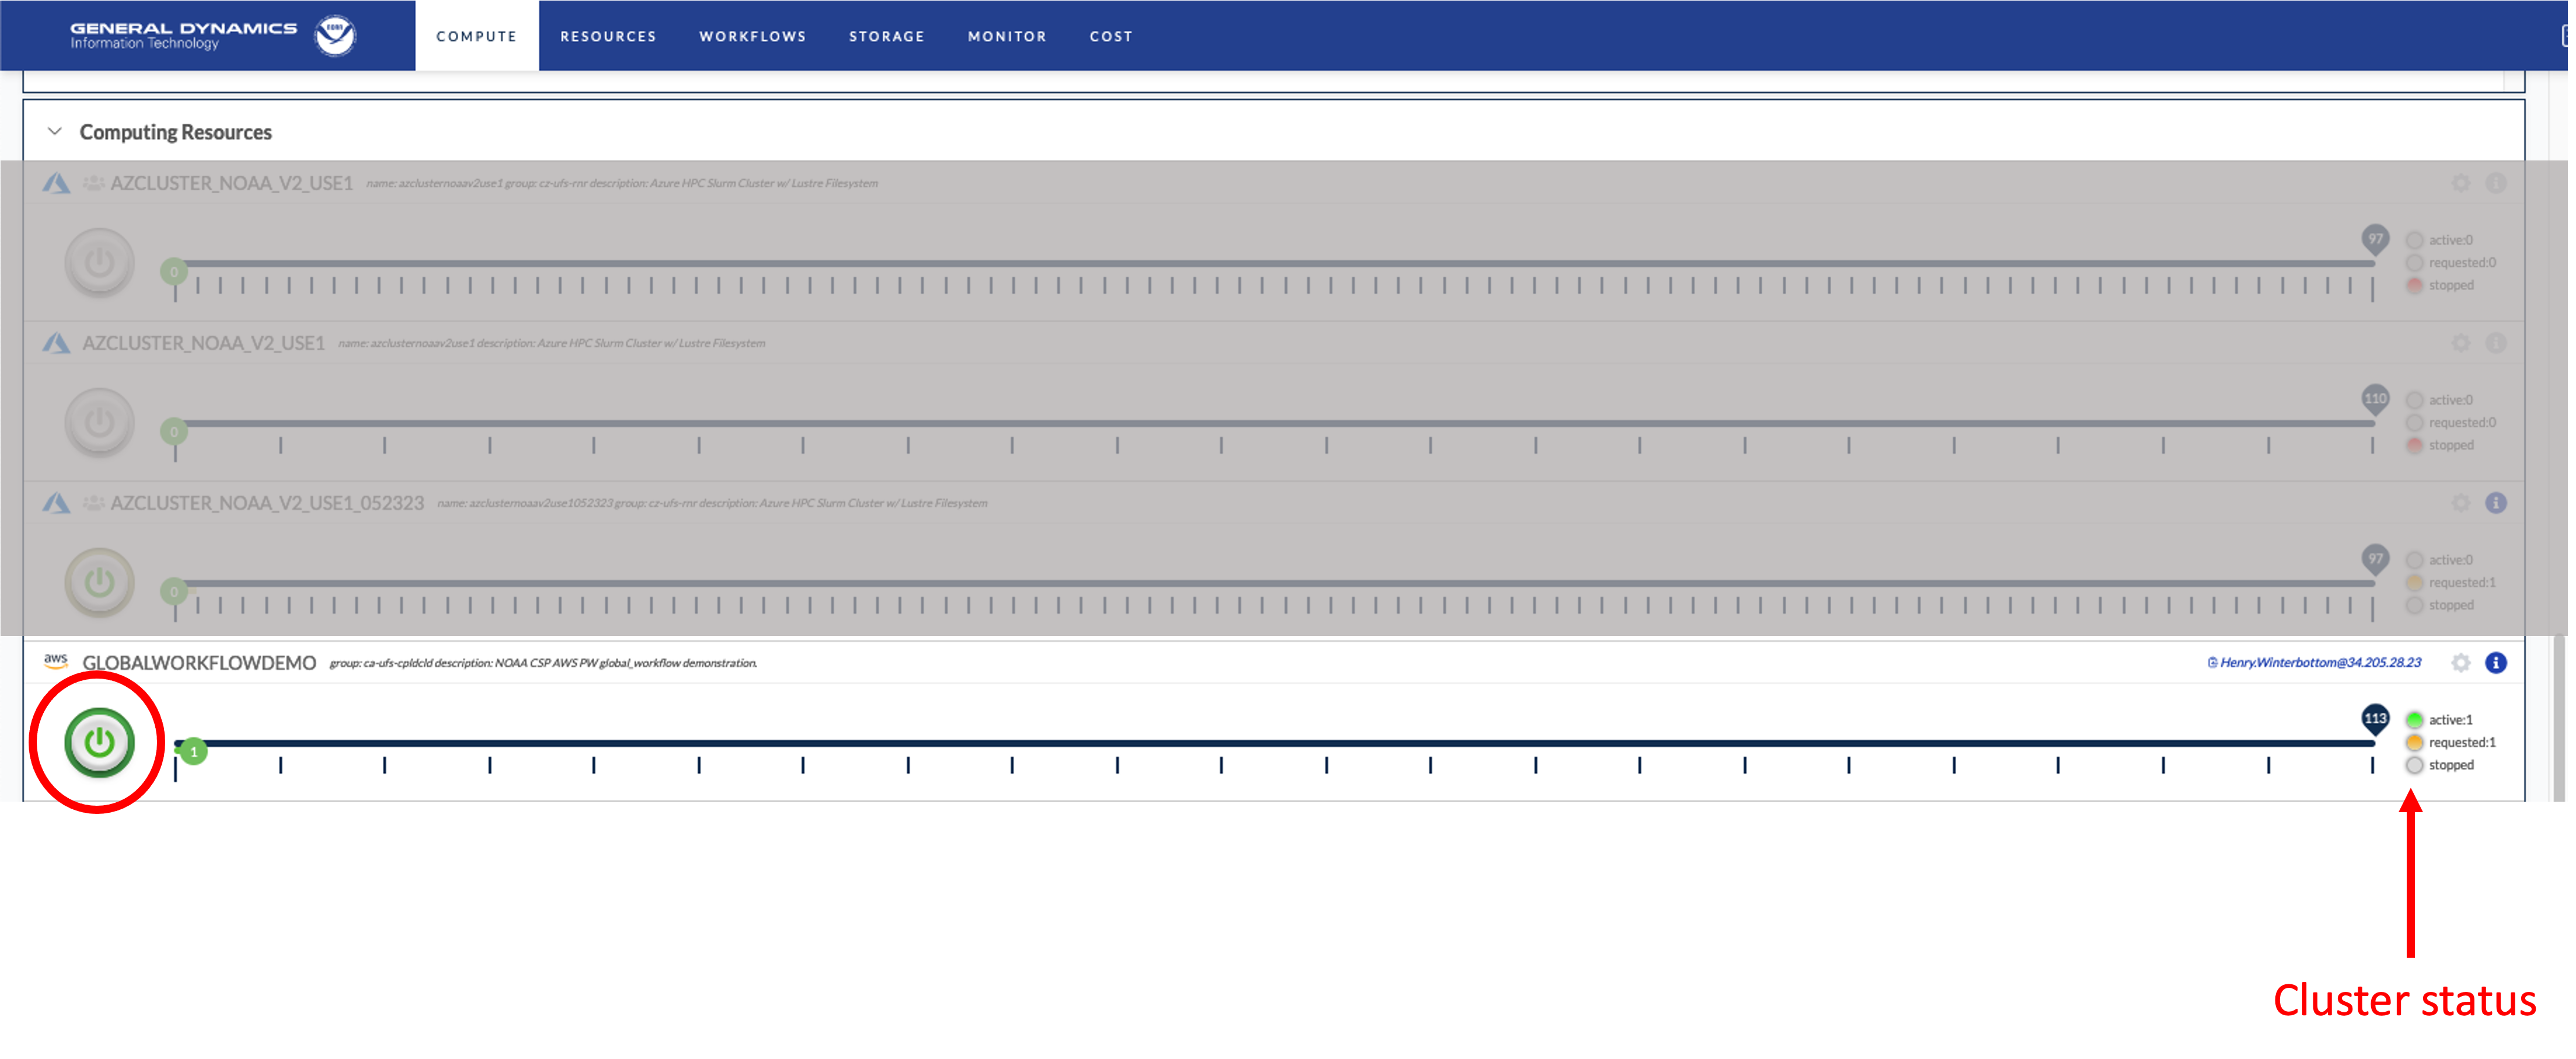
7.4. Using the NOAA CSP Cluster
To activate the cluster, click the button circled in :red-text:red. The cluster status is denoted by the color-coded button on the right. The amount of time required to start the cluster is variable and not immediate and may take several minutes for the cluster to become.
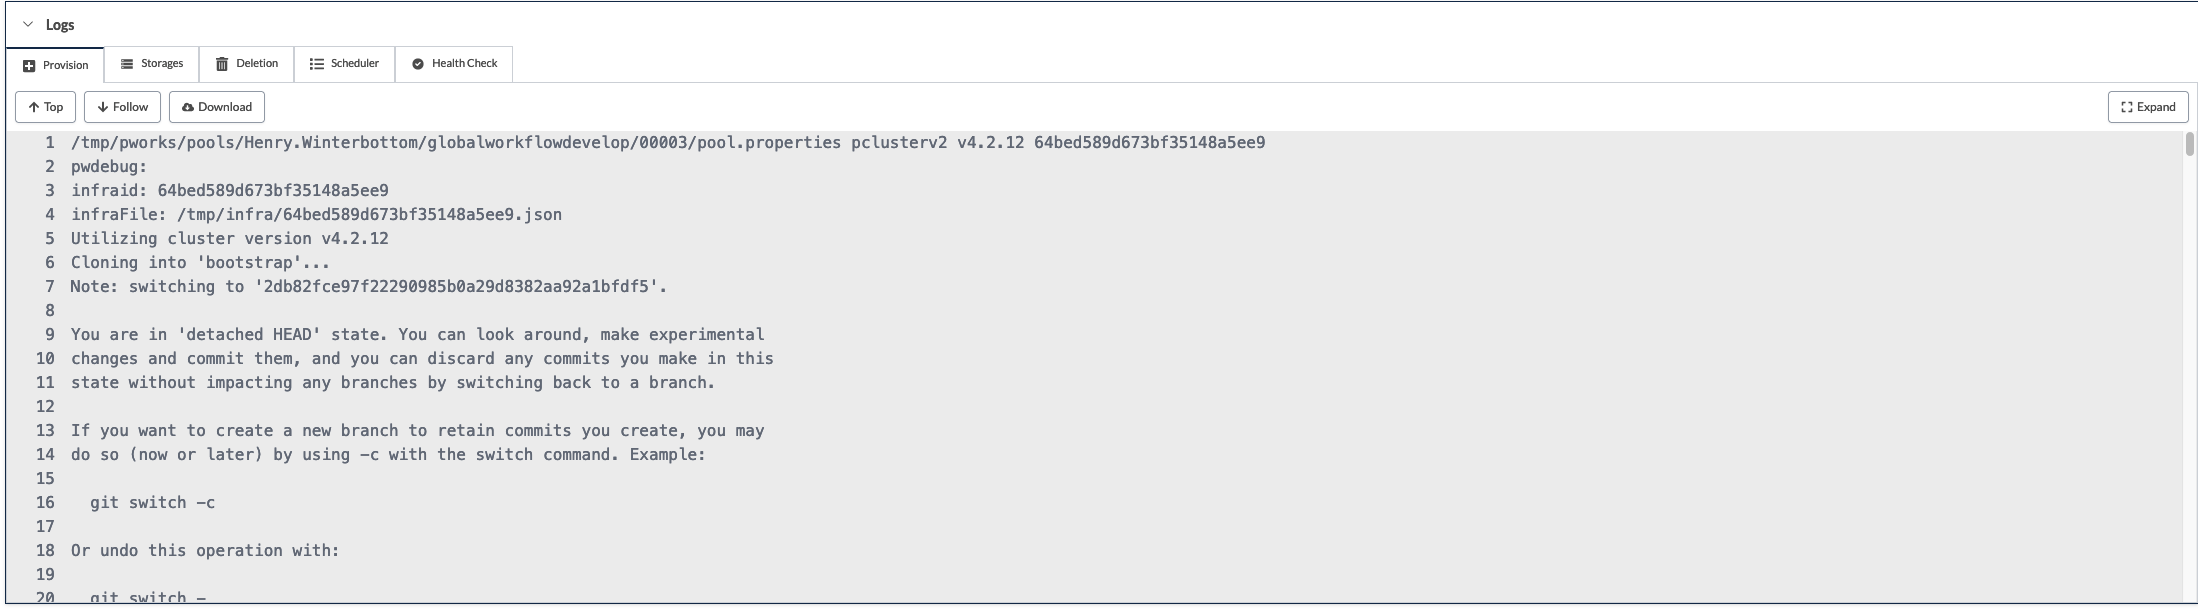
For instances where a NOAA CSP cluster does not initialize, useful
output can be found beneath the Logs section beneath the
Provision tab as illustrated below. Once again, when opening
issues related to the NOAA CSP cluster initialization please include
this information.
7.5. Running the Global Workflow
The global-workflow configuration currently requires that all initial
conditions, observations, and fixed-files, are staged in the
appropriate paths prior to running the global-workflow. As suggested
above, it is strongly recommended the the user configure their
respective experiments to use the /lustre file system for the
EXPDIR and ROTDIR contents. The /contrib file system is
suitable for compiling and linking the workflow components required of
the global-workflow.
The software stack supporting the develop branch of the
global-workflow is provided for the user and is located beneath
/contrib/emc_static/spack-stack. The modules required for the
global-workflow execution may be loaded as follows.
user@host:$ module unuse /opt/cray/craype/default/modulefiles
user@host:$ module unuse /opt/cray/modulefiles
user@host:$ module use /contrib/emc_static/spack-stack/miniconda/modulefiles/miniconda
user@host:$ module load py39_4.12.0
user@host:$ module load rocoto/1.3.3
The execution of the global-workflow should now follow the same steps as those for the RDHPCS on-premise hosts.