4. Build AWS EC2 Cluster
Note
These instructions are only necessary if you wish to set up your own AWS instance to run global workflow. Anyone using an existing HPC cluster can skip this section.
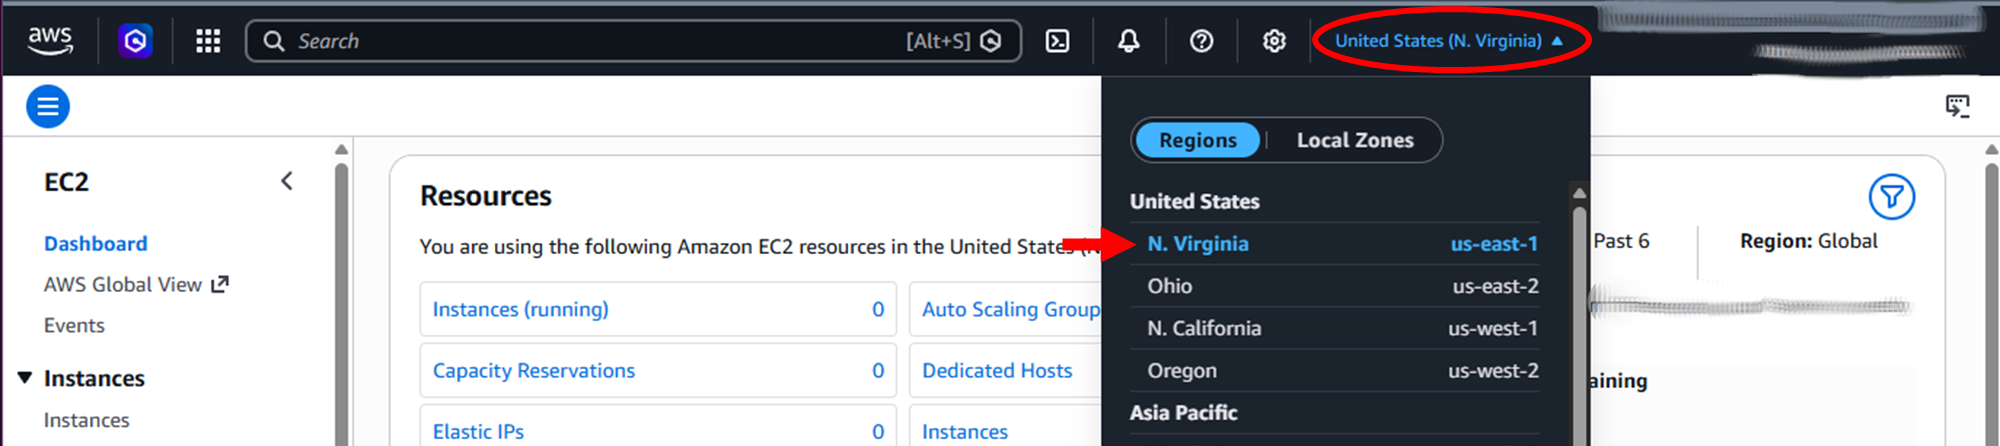
The global workflow can be run in Amazon Web Services using their HPC platform product AWS ParallelCluster. There are some pre-requisites. First the user will need two software packages, the AWS ParallelCluster client version 3.13.2 and HashiCorp Packer 1.15. It is recommended that you install these on a small Amazon Linux 2 EC2 utility host (t3.micro or similar). The utility host should have connectivity in the same subnet that you are planning to use for your AWS ParallelCluster. Take note that all of our activities occur in the AWS region us-east-1. This WILL not work properly in another region (e.g, us-east-2 or us-west-1).
Warning
To proceed you will need to have a paid AWS account.
4.1. Create a utility AWS instance
To create a utility instance for bootstrapping cluster creation, navigate to the AWS EC2 Console (US‑East‑1 region).
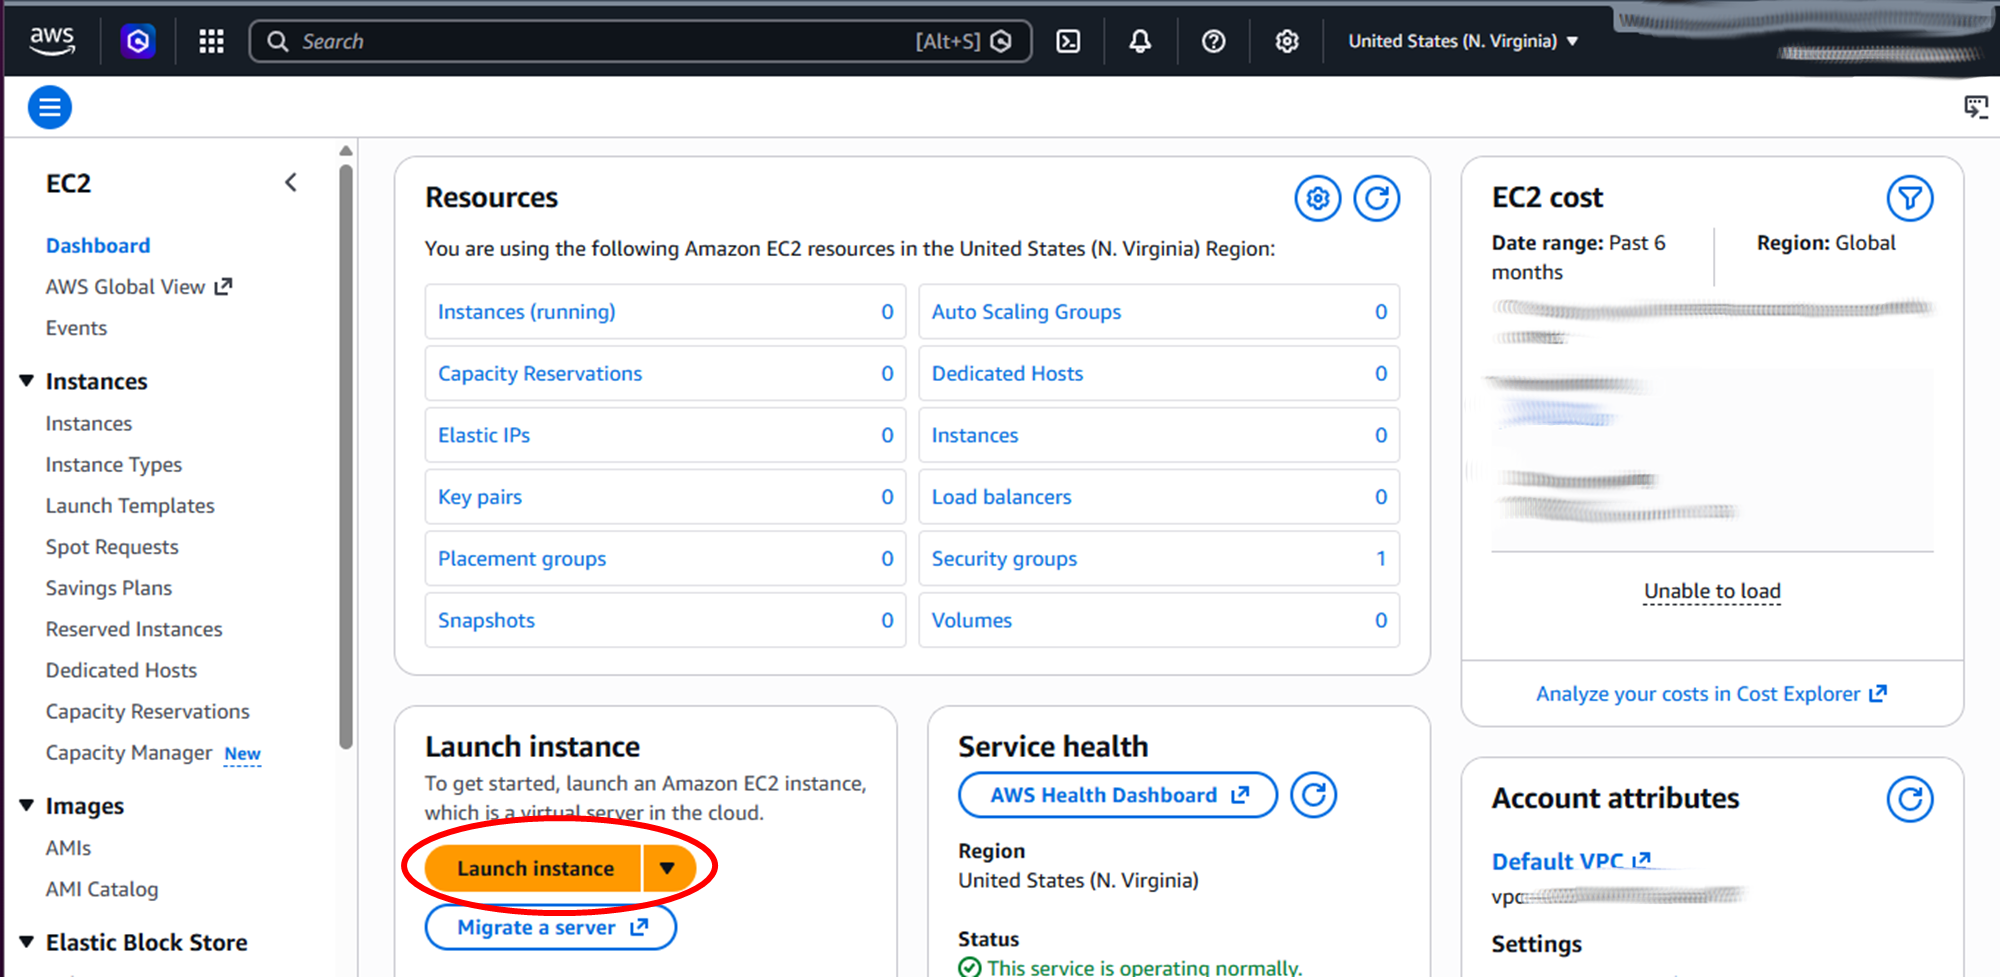
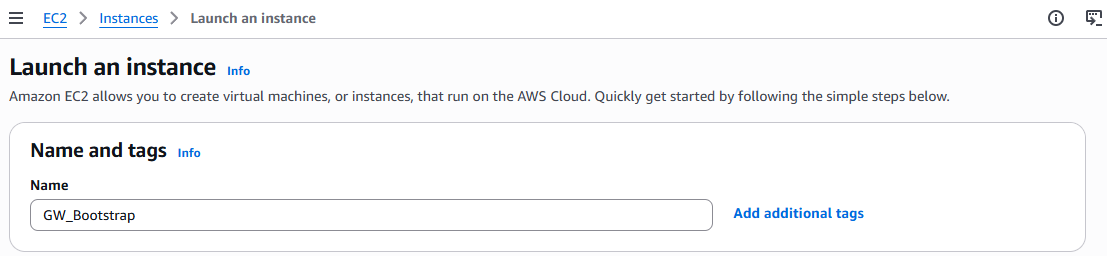
Click on Launch instance button and fill in the Launch an instance form with the following:
Name and tags: Whatever you want (
GW_Bootstrapis used in this documentation)
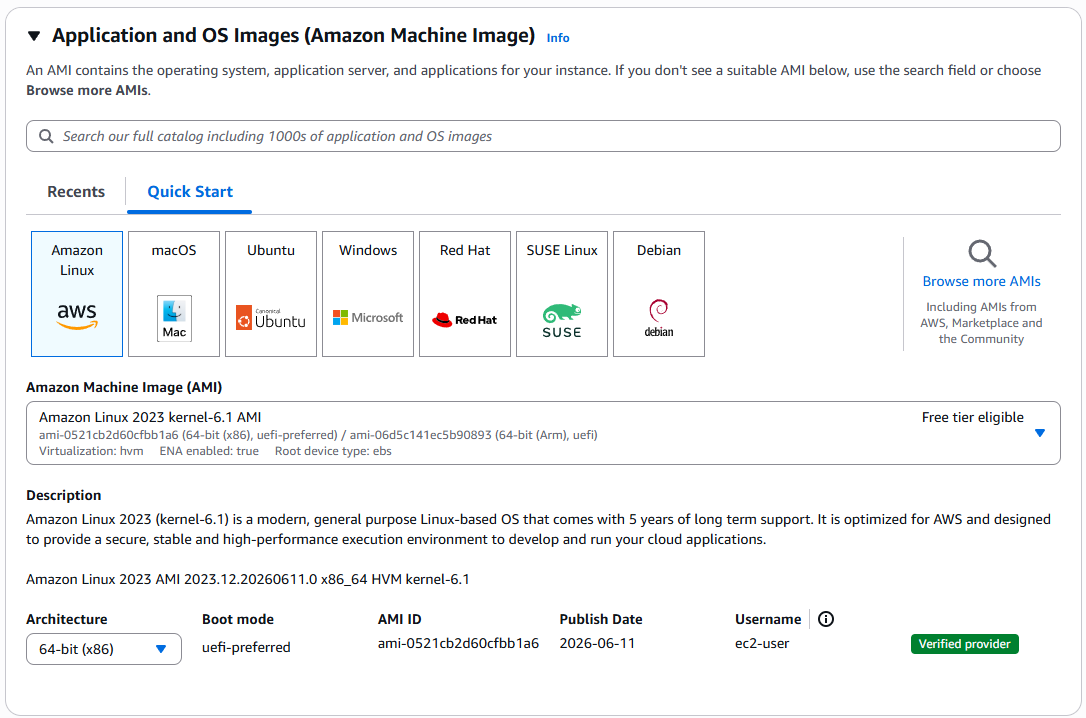
- Application and OS Image:
AMI:
Amazon LinuxArchitecture:
64-bit (x86)
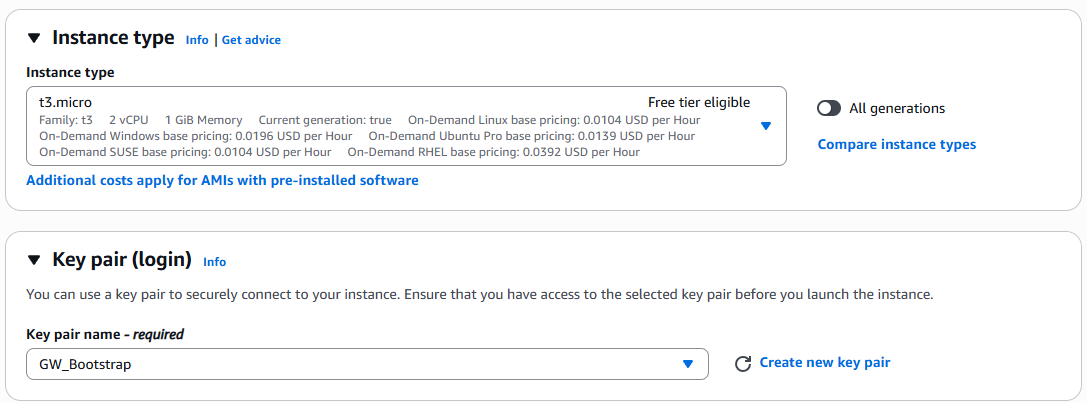
Instance type:
t3.micro- Key pair:
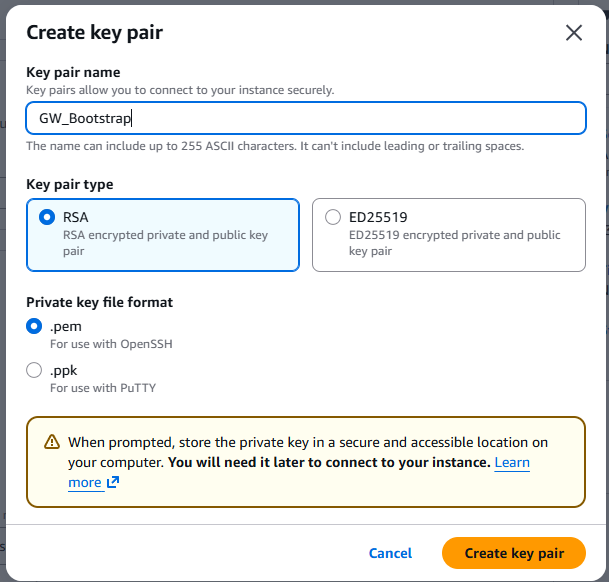
- Click on Create new key pair and populate or confirm the following fields
Key pair name:
GW_BootstrapKey pair type:
RSAPrivate key file format:
.pemClick on
Create key pair
This only needs to be done once. In the future, the key pair should appear in the drop-down.
Network settings: Leave as defaults
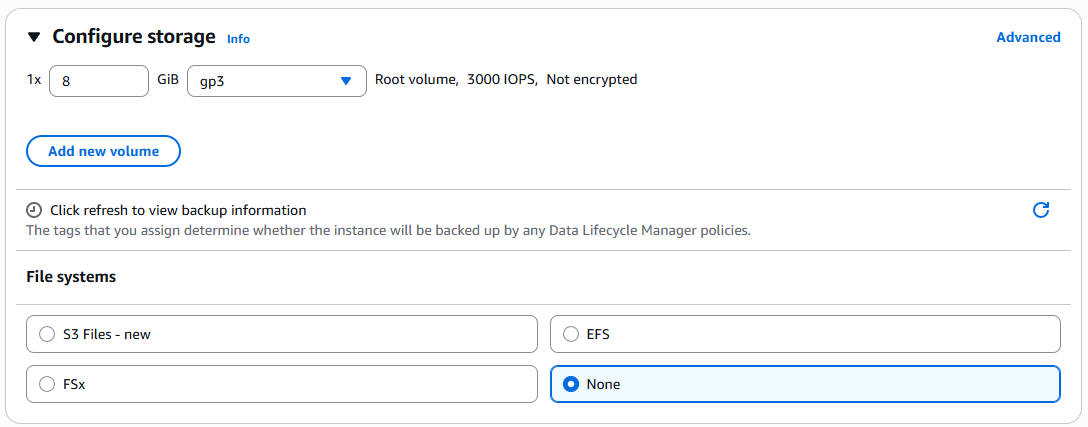
- Configure storage
1x
8GiBgp3File systems:
None
Advanced details: Leave as defaults
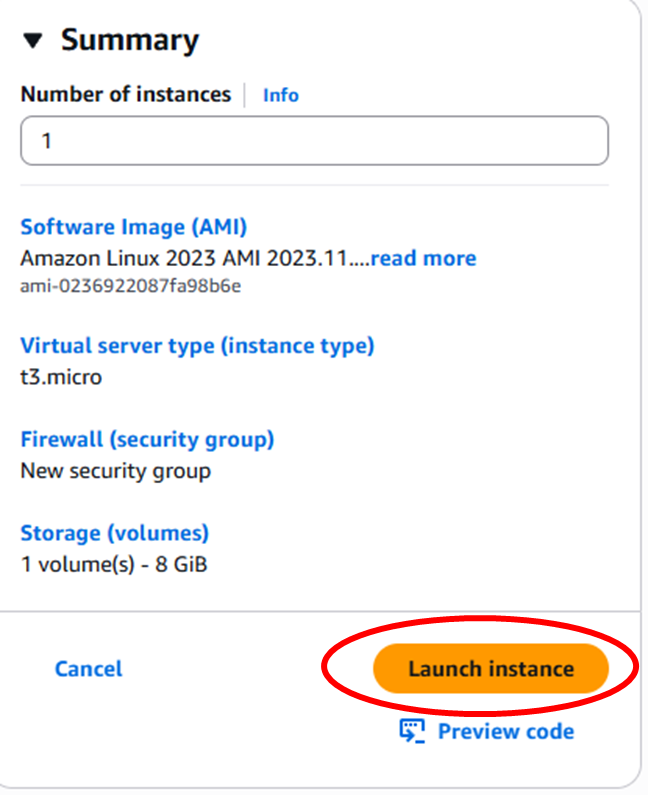
When you have filled in all the settings, click on the Launch instance button on the sidebar on the right (or at the bottom, if using a narrow window) to launch the EC2 instance.
You should then see a success message with the instance ID, which links to the instance page

Click on the instance to bring up the instance page, this will show the public IP for the instance
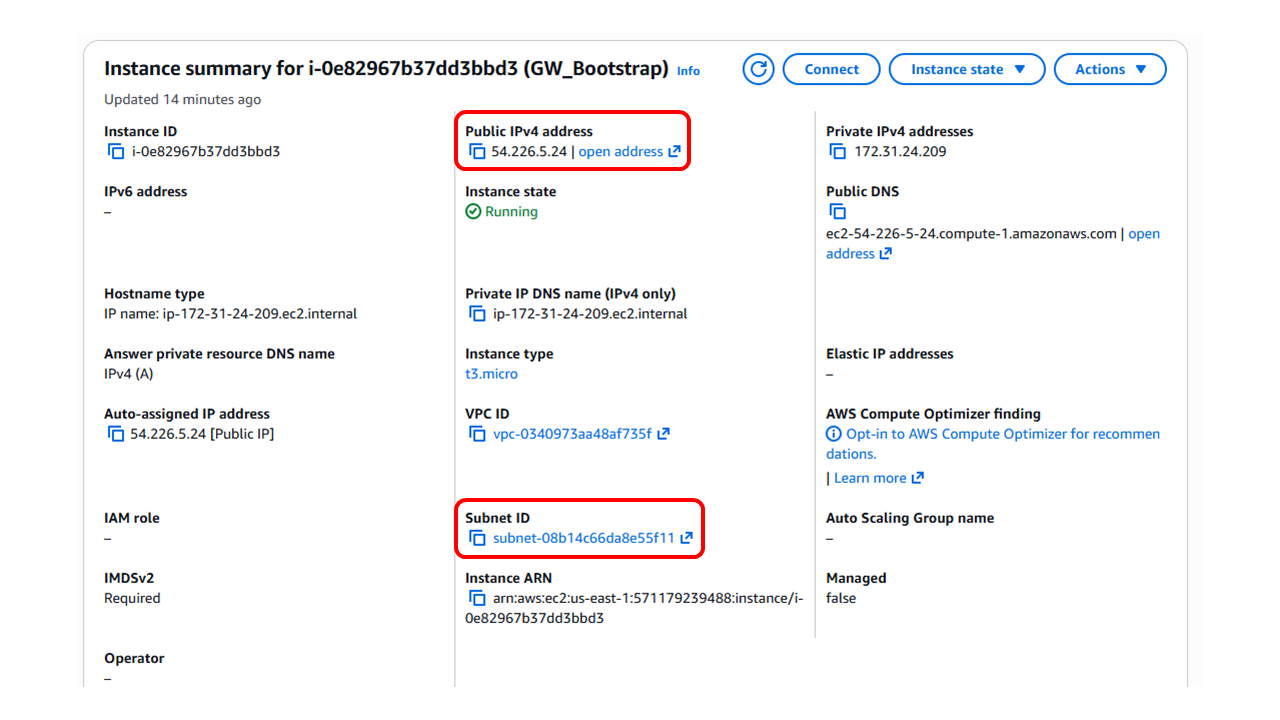
Note down the Public IPv4 address and the Subnet ID, we will be using these in the next step.
4.2. Connect to Bootstrap Instance and Build AMI
Now it is time to connect to the bootstrap instance to prepare and build the cluster image.
First, copy the key file that was downloaded in the previous step somewhere convenient. Then, use ssh to connect to the instance using the key file and the public IP with the username ec2-user:
ssh -i "/path/to/GW_Bootstrap.pem" ec2-user@<public_ip>
Now that we are into the bootstrap instance, we need to install Packer and ParallelCluster
Users may refer to the directions on Installing HashiCorp Packer and AWS ParallelCluster.
sudo yum install -y yum-utils shadow-utils
sudo yum-config-manager --add-repo https://rpm.releases.hashicorp.com/AmazonLinux/hashicorp.repo
sudo yum install packer
Note
It is required to use the Amazon EC2 plugin in conjunction with Packer. Amazon EC2 plugin can be installed by issuing the following command with Packer:
packer plugins install github.com/hashicorp/amazon
sudo yum install python-pip git
Users may refer to the directions for Installing AWS ParallelCluster in a non-virtual environment using pip.
It is recommended to set the version specific to 3.13.2
pip install aws-parallelcluster==3.13.2
Once the utility host has the appropriate build tools, the baseline image can be built.
Use git clone command download the GW configuration file templates from this NOAA-EPIC GitHub repository
git clone https://github.com/NOAA-EPIC/global-workflow-AWS.git
cd global-workflow-AWS
Update the parameter subnet_id in the configuration file build_da_cluster.pkr.hcl with the Subnet ID saved previously.
It is also recommended that the screen command be installed on your utility EC2 host to ensure the terminal does not time out during the lengthy build process. This can be done using the following command.
sudo yum install screen
Once installed, start a screen by simply issuing the command screen. Once the current terminal is attached to a screen (this can be verified by issuing the command screen -ls), use packer to build the initial baseline image.
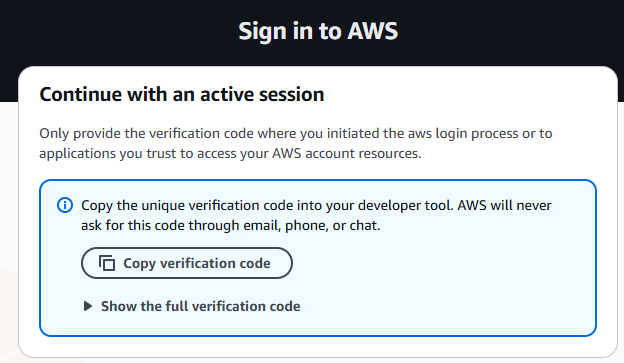
Before we begin, ensure your terminal session has valid AWS CLI credentials in order to run packer in AWS. To learn more about this, check out this AWS CLI Userguide
Authenticate using:
aws login --remote
Copy the authentication link to a local browser, choose the correct account, then copy resulting code back to the terminal.
Once the terminal session has been properly authenticated, you are now ready to build the initial baseline image. This can be accomplished by issuing the following commands:
First, set the environment variable to create a logfile:
export PACKER_LOG_PATH="packer.log"
Then, set the environment variable to ensure the logfile is easily readable:
export PACKER_NO_COLOR=1
Now, begin building the initial image using the following command:
packer build build_da_cluster.pkr.hcl
This process will take approximately two hours to complete. It is recommended that you detach from the building screen (press ctrl-A, then press ctrl-D) and simply follow the build through the packer.log logfile.
Once the build is complete, you should see an AMI listed under your Amazon Machine Images. Take note of the AMI ID, as this will be used in the AWS ParallelCluster configuration.

4.3. Create Persistent Lustre Filesystem
Due to the heavy I/O load necessary to run the Global Workflow it is recommended that an FSx, an AWS managed high-performance file system service, can be created for Lustre file system to eliminate bottlenecks. This can be done outside of AWS ParallelCluster through the AWS UI or CLI tool. Users may refer to this Getting started with Amazon FSx for Lustre guide.
Using scratch SSD should be fine for development cases, however for running in an operational environment it is recommended to use Persistent SSD to ensure consistent I/O performance.
For a basic development configuration, a type of SSD scratch2 with no compression and 12TB of storage capacity should suffice.
If the Lustre filesystem is created outside of AWS ParallelCluster by hand then it will need to be added to the ParallelCluster’s YAML configuration under the section Shared Storage. The FileSystemId will need to be added to the da_hpc.yaml configuration as in the example below.
SharedStorage:
   - MountDir: /lustre
     Name: globalworkflow
     StorageType: FsxLustre
        FileSystemId: fs-0c4241acba3119042
Should the user decide to have the AWS ParallelCluster create the Lustre FSx file system during the cluster build process, please see these steps below in the Building the AWS ParalleCluster section.
4.4. Building the AWS ParallelCluster
Now that the initial base image build is complete, the cluster can be initialized using the AWS ParallelCluster yaml configuration file da_hpc.yaml from the GW AWS repo. Update the CustomAmi option with the AMI ID previously generated by the Packer build process.
Region: us-east-1
Image:
   Os: ubuntu2204
   CustomAmi: ami-000012345abcdef
HeadNode:
   InstanceType: c7i.2xlarge
   Networking:
      SubnetId: subnet-xxxxxx
   Ssh:
      KeyName: global-workflow
~~~
Also update the Subnet ID and the FileSystemId for the FSx Lustre system you created. Note that once again the AWS cloud region us-east-1 is being used and is recommended. Once the yaml has the appropriate configuration values the cluster can be created using the AWS ParallelCluster CLI tool.
Should the user decide to have the AWS ParallelCluster create the Lustre FSx filesystem instead of performing the allocation manually, they will need to set this in the Shared Storage section as in the example below.
SharedStorage:
   - MountDir: /lustre
     Name: globalworkflow
     StorageType: FsxLustre
     FsxLustreSettings:
       StorageCapacity: 12000
       DeploymentType: SCRATCH_2
For additional information refer to the AWS ParallelCluster documentation
Issue the following command to create the initial cluster:
pcluster create-cluster --region us-east-1 --cluster-name <your cluster name> --cluster-configuration <cluster configuration yaml name>
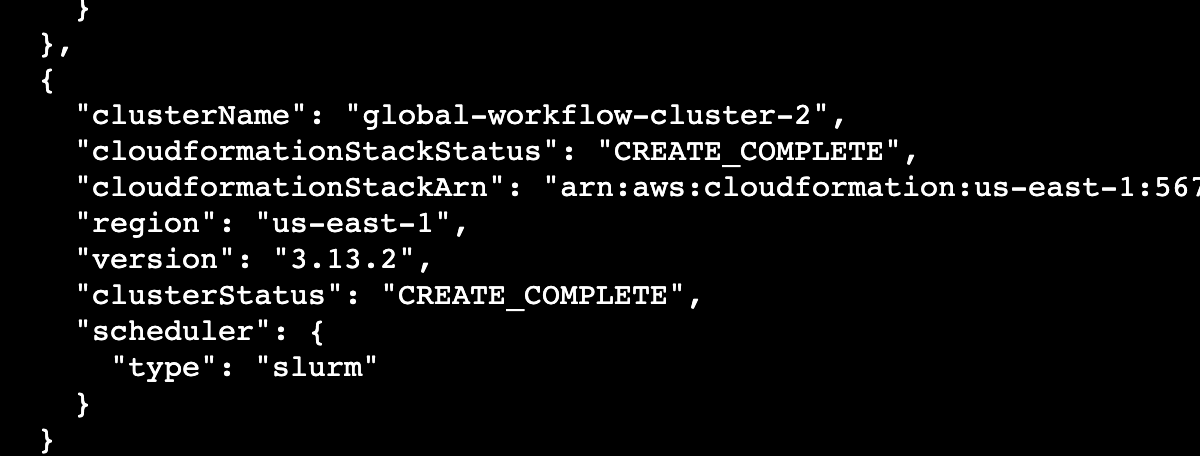
This process should take about 20 minutes to complete. You can view the status of your cluster through the AWS ParallelCluster CLI tool by issuing the following command:
pcluster list-clusters --region us-east-1
The results should list the cluster status as CREATE_COMPLETE once the operation has successfully completed.
4.5. Importing Data Repositories
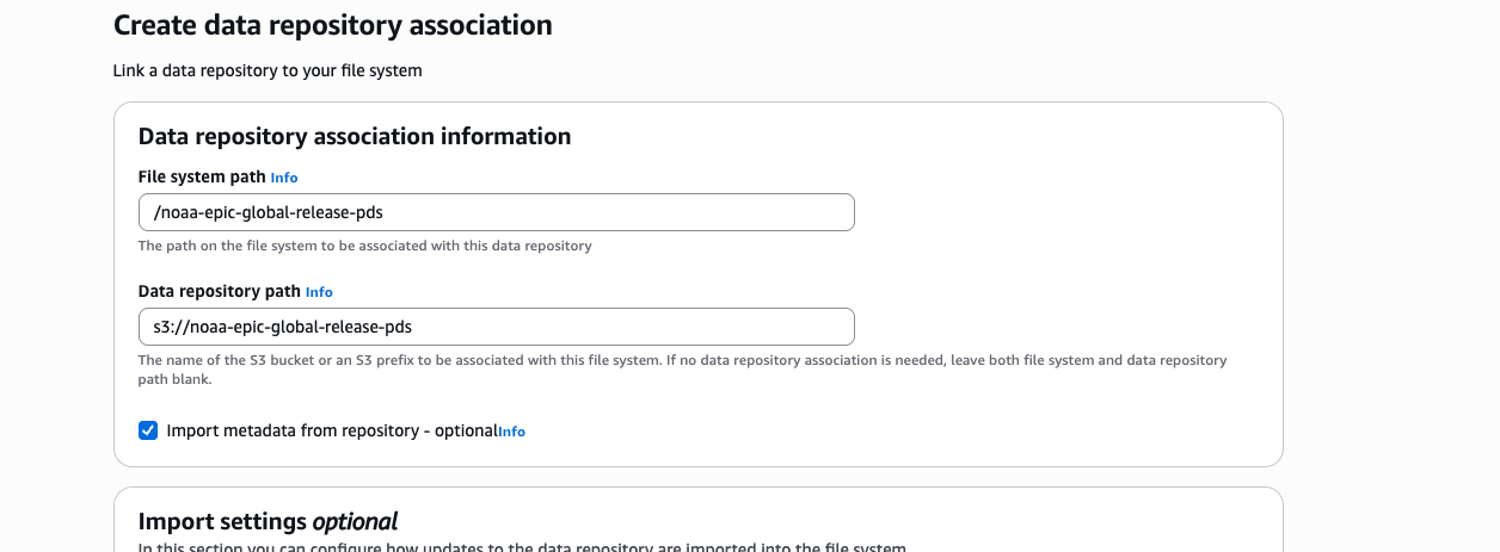
Once the AWS Parallelcluster has been successfully built, certain datasets should be imported to support running the GW. These can be imported directly into the Lustre FSx filesystem through a data repository association. The required datasets are noaa-epic-global-release-pds and noaa-nws-global-pds, which correspond to the S3 buckets s3://noaa-epic-global-release-pds and s3://noaa-nws-global-pds, respectively.
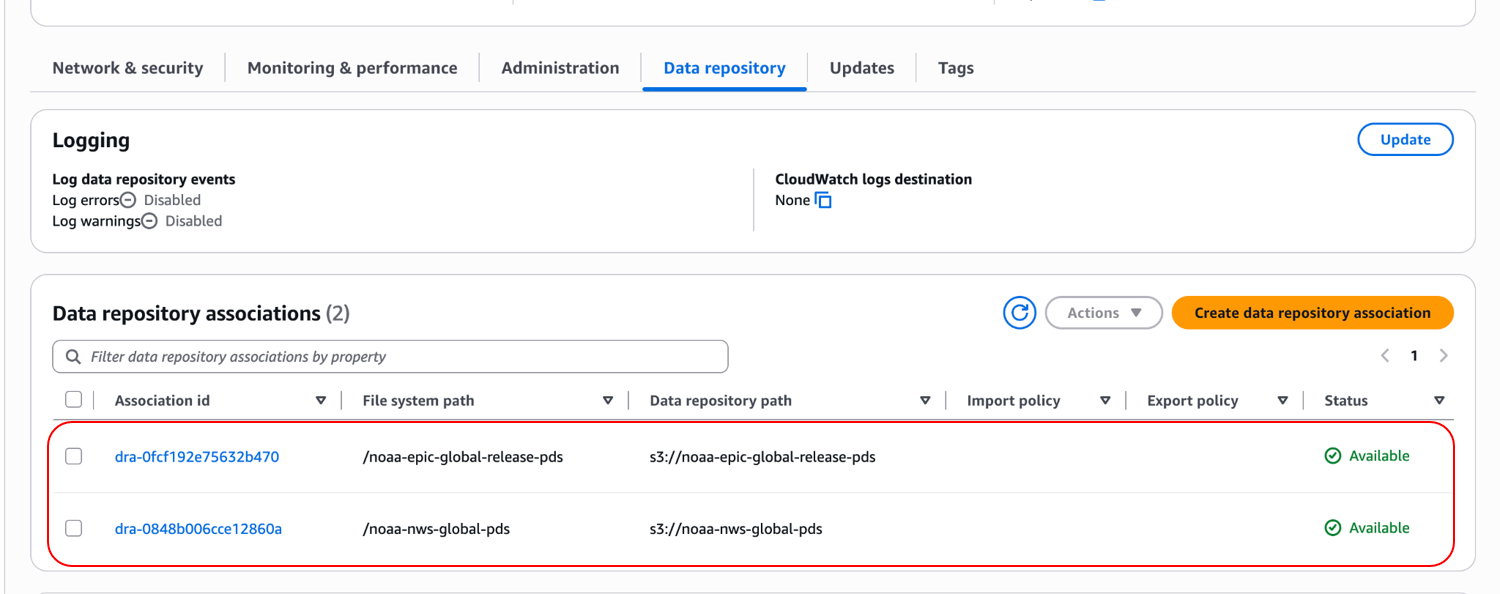
These can be added to the Lustre filesystem by using the “Create data repository association” button on the Data repository menu tab
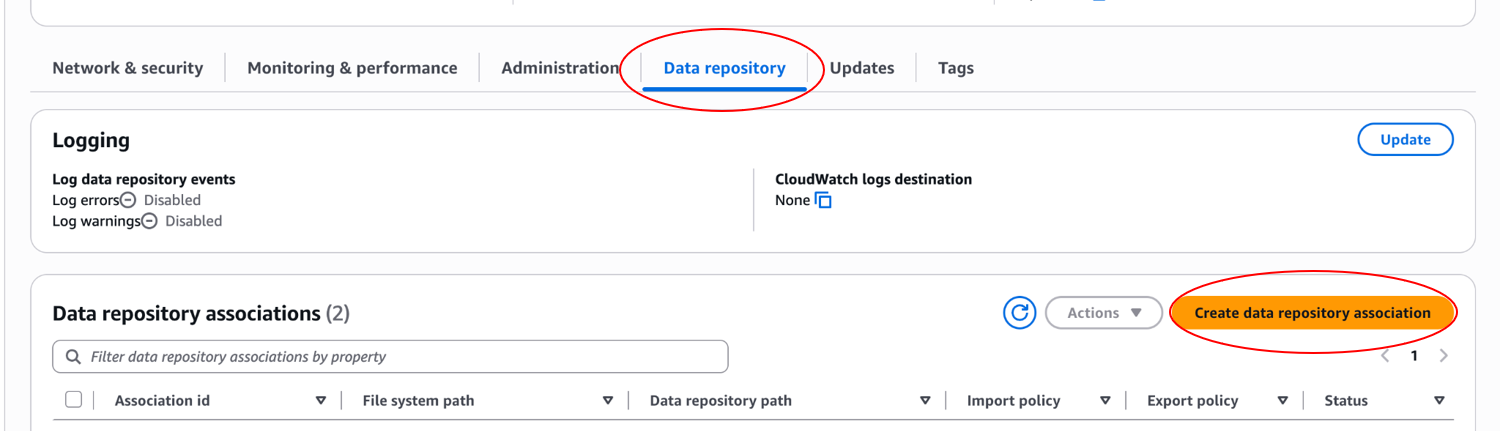
After clicking the Create data repository association button, you will get a dialog box. Populate the File system path dialog box with /noaa-epic-global-release-pds and the Data repository path dialog box with s3://noaa-epic-global-release-pds. Highlight the Import metadata from repository checkbox. Click deselect all for both the import and export settings and then click the Create button. This process will take a few minutes to complete.
Repeat this process for the second repository, noaa-nws-global-pds, using the values /noaa-nws-global-pds and s3://noaa-nws-global-pds respectively for the File system path and Data repository path parameters. After completion, the two S3 buckets should appear in the list of associations:
Additional information on how to perform this task can be found in this Overview of data repositories documentation.